
There are several hairstyles to own every day, but the top choice is hair twists. The natural hair community has been using this hairstyle for ages. Having hair twists looks fab and funky and is believed to be a protective hairstyle as it locks moisture, preventing split ends and breakage. Ending your hairstyle with glorious spiral curls needs a proper headline on how to do twists.
Curly hair lacks appropriate curl definitions and results in common twist-out problems. Do you know? The best way to make this hairstyle is to twist your hair and head to sleep when the style takes hold. Next morning, unfurl your twists, and you are ready to go with your twists out. Let’s come to the point of how easily you can make twists. Here we have a simple guide with 7 easy steps to look at.
Table of Contents
Step 1: Divide your hair into sections
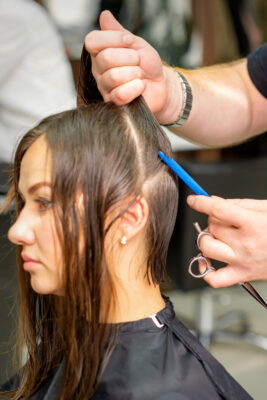
You need diligence and intention to end your hairstyle with a fabulous look. Section your hair into layers or quarters and save them with tiny clips, or you can make buns. Pull out the Section of your hair on which you want to make twists. Its size depends on what type of twist you want. If you wish to make smaller twists, you have to take smaller sections for the larger twists.
Step 2: Hydrate your hair
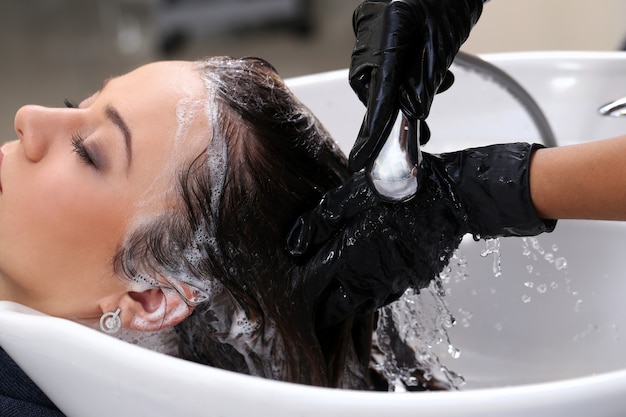
To work effectively, damp your hair first. Damp hair doesn’t possess dripping water but is also not dry. Use a spray bottle having a fine nozzle to hydrate your hair.
Step 3: Maintain your hair moisture content

Twist-outs require moisture to get a proper hold. Use your favorite oil and massage your hair to get a silky outlook. Then wash hair with a mild shampoo followed by a leave-in-conditioner. Lock up the moisture with curl holding cream.
Step 4: Remove hair tangles

Tangle hair would not result in fine smooth curls, so removing tangles is the need of the hour. Hold a wide-tooth comb or use your fingers and detangle the knots.
Step 5: Make hair twists.
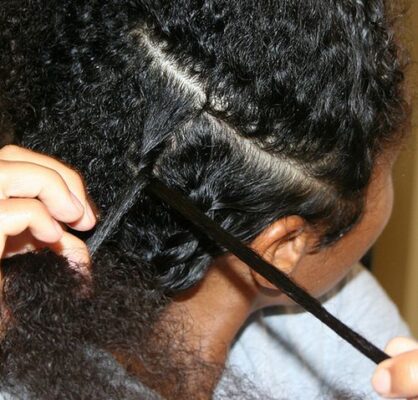
You cleared a step with knot-free moisturized hair, and now it is time to do some acts with hair strands. How big and small curls you want is your own choice, so decide first. Apply a little gel or holding cream and comb it to get a defined hair strand. Include the hair edges into the twists. Here we have many hair twist options for you. Just check out below!
Single strand twists:
These twists are also named finger coils and are the most time-consuming option. You have to expend a lot of gell or cream when small twists look is a desire. Start twisting your hair from the root either inward or outwardly until you get a coil.
Two strand twists:
This most common twist gives a frankly look that people love. Grab a mini hair section to work on, and make its two divisions. Stretch the hair out and start making twists until you meet the end. Get some gel and curl the end of the hair strand with your finger.
Flat twists:
A flat twist will give you considerable curl definition from the root up. A flat twist is essentially a two-strand look. Section a row of hair, divide the top of the row into two strands, and start twisting over and under, gathering additional hair into the two strands while keeping the twist flat on the head.
Step 6: Dry your hair
Too damp hair, either because of the gel or the water, would not result in long-lasting curls. Enjoy your twisted curls for longer by giving your hair time to dry. Cover your hair strands with a satin or silk scarf if you have to leave your hair twisted overnight. It will maintain the moisture of the hair and also keep them smooth.
Step 7: Untwist your hair in a right way
This is the last step in your how-to-do twist section, and if it’s not done correctly can ruin all your previous work.
Single strand twists:
Apply your favorite oil on your fingertips before untwisting your hair single strand twists. If you do not make a hurry, you will get a shiny and glamorous look. Start twisting your hair in the opposite direction to unravel the coil. Split the hair strand into two parts and retwist each Section as you did it before.
Two strand twists:
Spray a little oil on your twist. Start untwisting your hair from the bottom. Use your fingertips to get thinner curly strands. This look is fabulous for zig-zag curls. Your fingertips should be damped with the oil. It will prevent the hair strands from frizzing. Suppose you want extra volume in your twist. Use a wide-tooth comb to do so.
Flat twist:
As you untwisted your hair strands before in two-strand twists. Start unraveling your flat twist from the bottom Section. You will end up with fine ready-to-go curls.
Will hair twists be worth it?
“You should embrace your twists because they are the reflection of your soul. It’s dense, it’s kinky, it’s soft, it’s textured, it’s difficult, it’s easy, and it’s fun. That’s why so you can flaunt with confidence!”
Jennifer Jones
Hair twists are so popular and require less time to create a look. Around 4-12 hours are needed to get braids done, but you will get ready with your mini twists to go out in just 1-4 hours. You will spend less or more time depending on the length and thickness of your hair.
There are many styling options to own with hair twists like a bun, perm rod curls, half up, half down, or Bantu knots. It requires an approx half hour or less to get your hair back as before. It is the top benefit of hair twists as braids need more time to get removed.
Also, see how to grow low porosity hair
Final verdict
Making hair twists is just love for some people, but twists are the need of the hour. It is good to turn hair twists into versatile hairstyles or leave them flowing. This article has discussed how to do twist, including single, double, and flat strands, and their step-by-step guide with the benefits. Do you have any questions? Feel free to ask below.
Happy styling!


